How to Build a Dinosaur part V
Links to the other posts in this series:
Part I
Part II
Part III
Part IV
Part VI
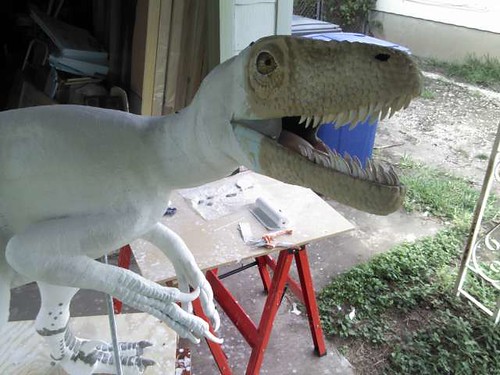
When last we left our Deinonychus, he was more or less rounding into shape. I had sculpted all four limbs, the head and the tail. Most of the claws were done, sculpted from polymer clay, as well as the teeth, also of polymer clay and set in epoxy clay.
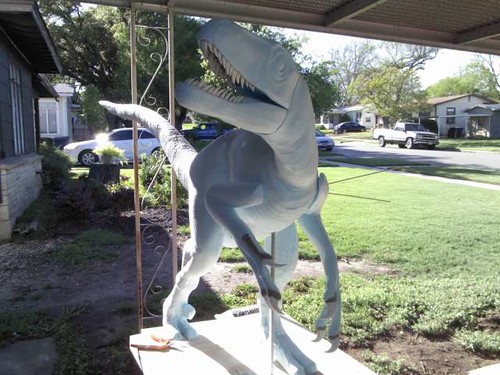
I knew that parts of Mr. Deinonychus (or Ms. depending on how you feel) were going to be covered in feathers, but for the parts that wouldn't be--the legs, feet, hands and snout--he would have to be painted. I also needed to figure out a way to make scales and eyes.
For the eyes, I initially thought I could paint them, then glaze them with some kind of transparent resin to give them a liquidy feel. But a cursory look around the 'net at dinosaur sculptures with painted eyes shows how lousy that looks. Painted eyes lack depth. I decided I would go with taxidermist's eyes, because they use a thick layer of acrylic resin or glass to create the necessary luminosity I wanted. I ordered monitor lizard eyes in the correct proportions for my Deino (basically Ostrich-sized) from Tohickon Glass Eyes. I dremeled out sockets in the head, obliterating a lot of carefully-sculpted work, and set them in place with epoxy clay, in a slightly forward-looking position.
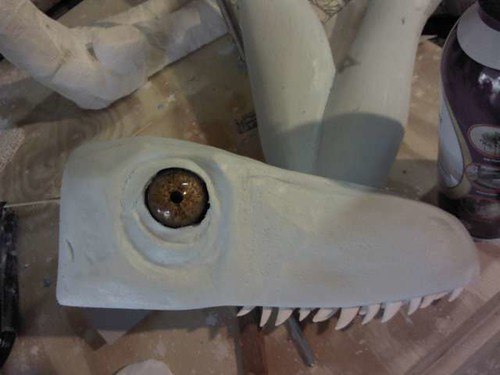
I then placed epoxy clay "eyelids" above and below the eyes to cover the edges of the sockets. It was upon doing this that I figured out how I might tackle the scales for this guy.

My first idea had been to make a scale "stamp" from polymer clay that I would ostensibly press into wet epoxy clay already smoothed onto the surface of the sculpture.

It didn't work so well. Even wet, the stamp kept picking up too much epoxy clay and I though the impressions were weak and rather repetitive. To truly look natural, I realized I was going to have make each and every scale by hand, and my experience with the eyelids showed this would be possible, if time-consuming. I started with the face, thinking I might get away with a "scattering" of scales:
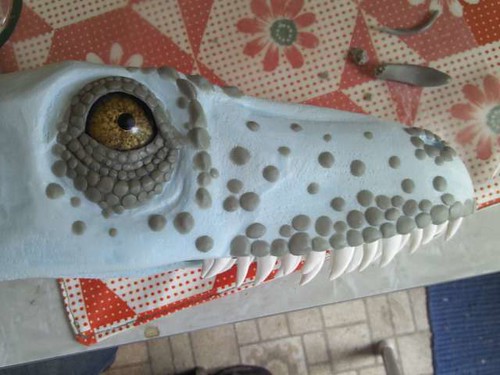
This might have worked, but I couldn't leave well enough alone. So I went for broke with the scales on the face, and this was the result (the face is also primed here with acrylic gesso):
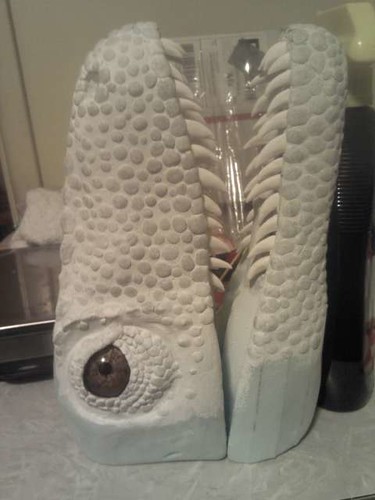
It's at this point that I realize I have a new problem to solve. Since our Deinonychus is only made of blue insulation styrofoam, he's not very durable. In case you've never played with the stuff, styrofoam breaks and dents very easily, and will only support its own weight to a point. For this reason I constructed the tail of vertically-oriented planks of styrofoam and built a support rod for the chest so the legs weren't bearing the full weight of the sculpture. I also used wooden skewers and PVC pipe to reinforce all major joints between any heavy segments. So what to do for more support and rigidity? I knew from internet research and the advice of a few friendly folks on Flick that foam sculptures are often reinforced and made rigid by coating them in fiberglass, a self-hardening plastic called Styroplast, or plaster-impregnated cloth. The first two options would also weather-proof the sculpture. Since I knew my Deino was staying indoors, I decided to use plaster cloth to coat the whole sculpture, before going in and scaling with epoxy clay.
The process is simple--strips of cloth are dipped in water and then wrapped and smoothed onto the sculpture in overlapping layers. The more layers, the harder and more durable the surface.


In the heat of a South Texas spring the plaster dried quickly, and so the work of wrapping the entire Deino only took a few days. Joints between the heaviest members were doubly and triply reinforced, especially at the base of the tail and where the head meets the neck. Below is the fully-wrapped Deinonychus with a partially painted head and the beginning of the leg scales going on. Kinda looks like a dinosaur mummy here.

Part VI: more scaling, paint and feathers!

Hi Paul,
ReplyDeleteI loved reading this piece! Well written!
Merlen Hogg
skumming isolering