How to Build a Dinosaur part VI
Here we are, the sixth and final installment of my long-overdue blog chronicling the Deinonychus I built this spring.
Links to the other posts in this series:
Part I
Part II
Part III
Part IV
Part V
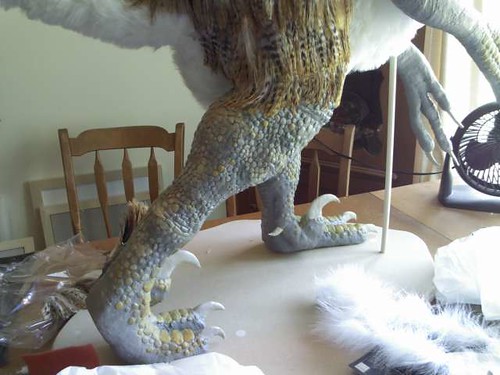
When last we left, I was in the middle of the long and tedious process of applying epoxy clay scales. Since most of the deino is going to be covered with feathers, I decided only to cover the legs, feet and hands. The head has been covered for a while now.
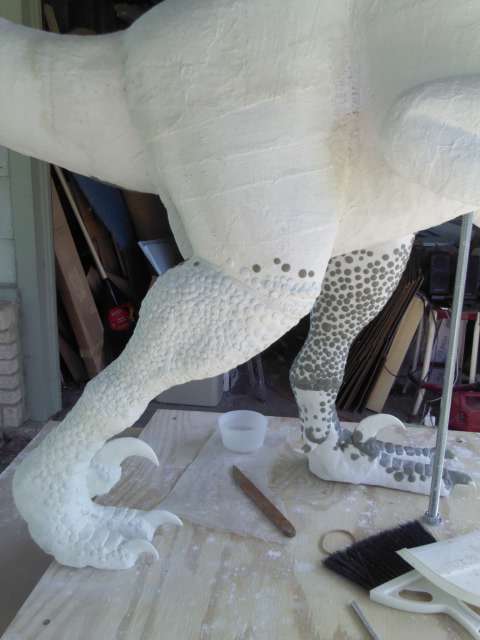
The leg on the left has a priming coat of acrylic gesso over the scales, as I'm going to paint this guy with acrylic paint.
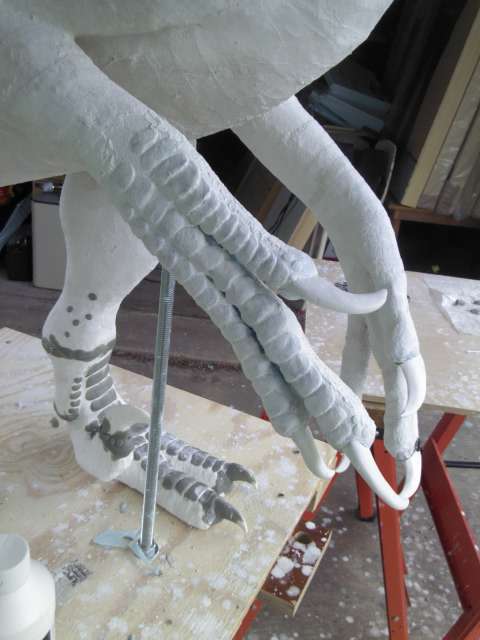
Detail of the hands:
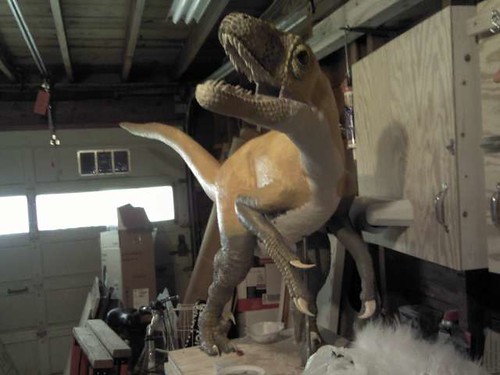
The whole guy scaled and ready to paint:

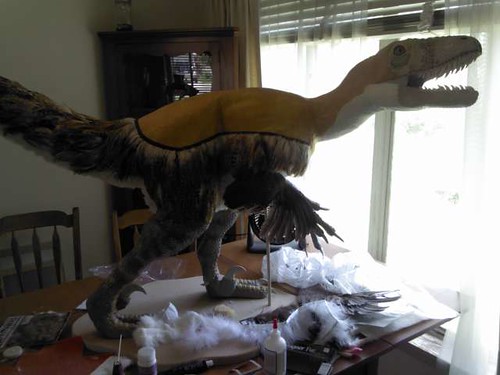
I started with the legs and arms:
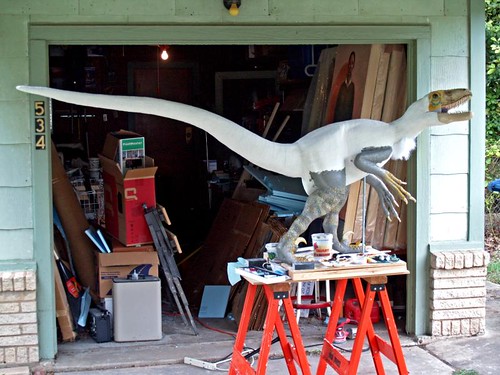
There's also a preliminary feather test going on in the above photo.
Closeup of the legs and arms. The paint was applied with a pouncing brush (commonly used for stencils) to minimize brushstrokes.

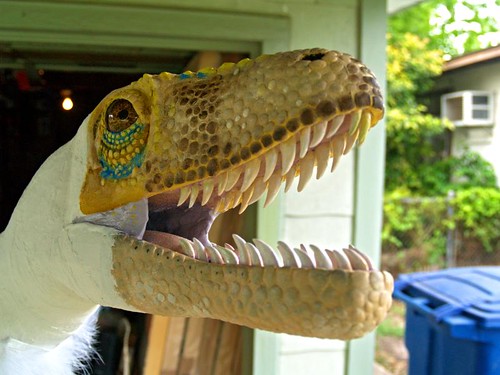
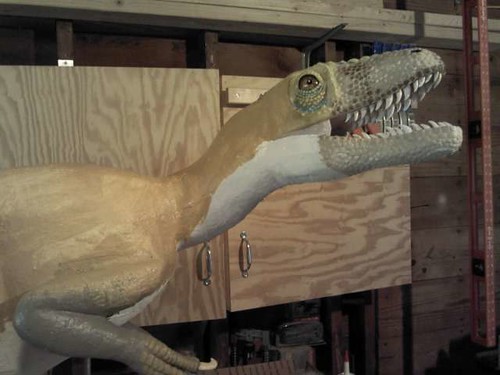
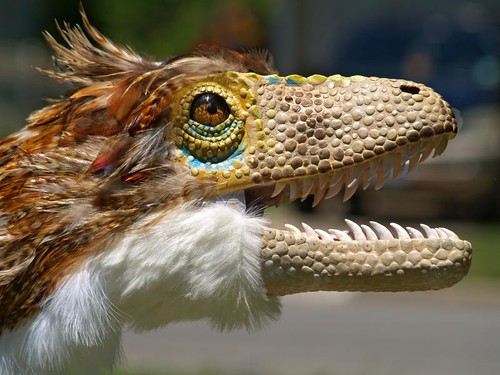
I decided to add a little more color to the face as well:
I painted a basic counter-shaded coat under where I planned to put the feathers. It served both as a means to reduce the visibility of the white plaster under the darker top feathers and as a template for where to place which feathers when I got to that step.
Before feathering I decided to build the final base for our hero. I cut a 24" x 48" MDF in half and glued the two halves together. When the glue was dry I freehand-drew a quick organic shape for the base then cut it out with a jigsaw. I then used a hand-held router with a roundover bit to smooth out and round over the top edge. When I was done the base was very heavy and very stable.
Turning Mr. Deino upside-down I drilled holes in the bottom of his feet and inserted short lengths of PVC pipe, epoxying them in place. I also glued a length of PVC into the already-made chest hole. I then glued lengths of wooden dowel into holes I drilled into the base (one is visible above) so that the bits of pipe in the feet and chest would slide down onto these dowels and fit snugly and stably, but could be removed if necessary.

Later I painted the base with three coats of satin black latex enamel.
Oh yeah-- the feathers.
The bottom layer of white feathers were added first, and I used craft/costume fur (fake of course) for the tail and torso and craft feathers stitched into satin bias tape for the underside of the neck. I glued and pinned everything in place.
I then laid in the top layer of feathers. I used rooster hackle also stitched into bias tape that I purchased from Lamplight Feather Inc. I started at the tail and worked my way toward the head, overlapping each course of feathers enough to cover the previous course's bias tape trim.
The arm feathers were whole dried rooster wings I purchased on Etsy.com. They were also glued and pinned in place.

The feathers on the head obviously couldn't be attached via bias tape, so I pulled them off the trim and glued each one on separately, placing them in holes I made with a metal probe.

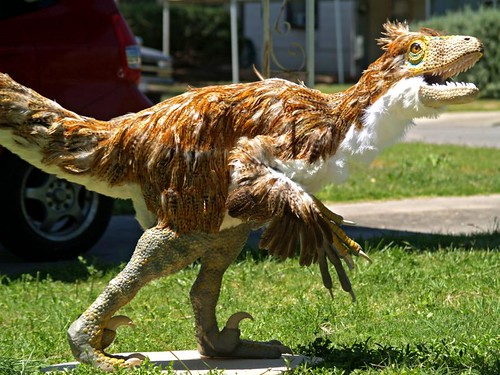
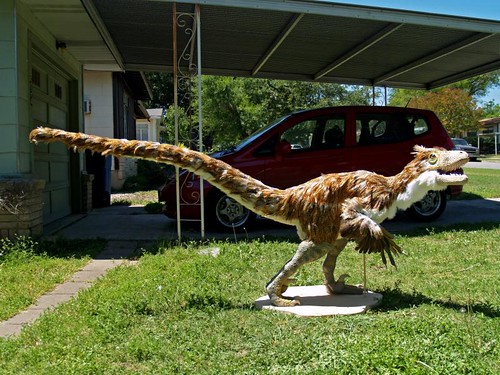
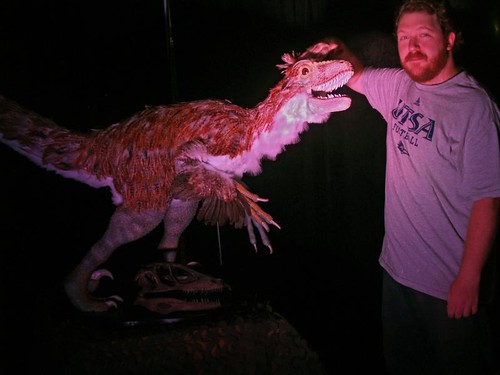
And then I was done! I put him in the yard and took a few photographs.
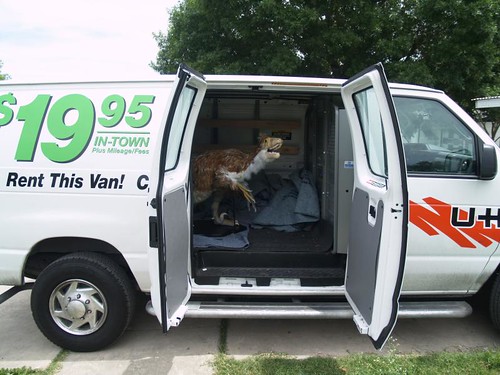
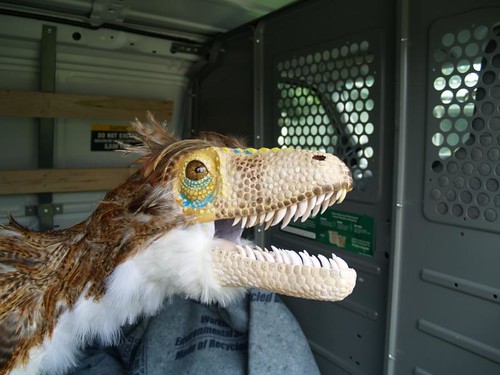
I took Deino to work in a U-Haul van.
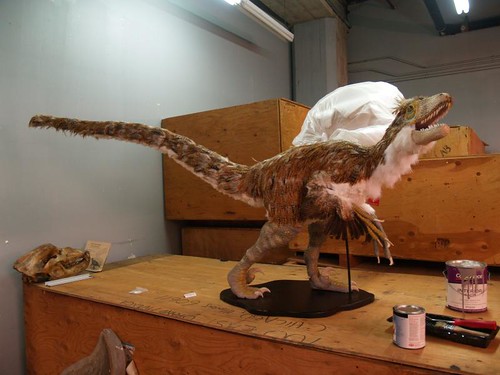
Here he is in the back room, waiting for his exhibit to be prepared.
And finally in his home, next to yours truly:
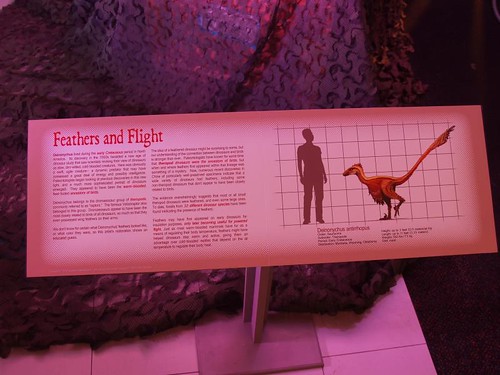
I prepared a little information placard:
Well, that does it for this series! It was certainly one of the most challenging project I've ever done, but also one of my favorites, and writing about it reminded me of the all the crazy things I did earlier this year that I probably never thought I'd ever do. And hopefully I'll get a chance to do another one some day...
Links to the other posts in this series:
Part I
Part II
Part III
Part IV
Part V
When last we left, I was in the middle of the long and tedious process of applying epoxy clay scales. Since most of the deino is going to be covered with feathers, I decided only to cover the legs, feet and hands. The head has been covered for a while now.
The leg on the left has a priming coat of acrylic gesso over the scales, as I'm going to paint this guy with acrylic paint.
Detail of the hands:
The whole guy scaled and ready to paint:
I started with the legs and arms:
There's also a preliminary feather test going on in the above photo.
Closeup of the legs and arms. The paint was applied with a pouncing brush (commonly used for stencils) to minimize brushstrokes.

I decided to add a little more color to the face as well:
I painted a basic counter-shaded coat under where I planned to put the feathers. It served both as a means to reduce the visibility of the white plaster under the darker top feathers and as a template for where to place which feathers when I got to that step.
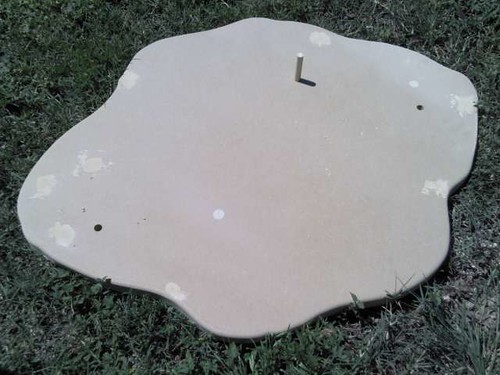
Before feathering I decided to build the final base for our hero. I cut a 24" x 48" MDF in half and glued the two halves together. When the glue was dry I freehand-drew a quick organic shape for the base then cut it out with a jigsaw. I then used a hand-held router with a roundover bit to smooth out and round over the top edge. When I was done the base was very heavy and very stable.
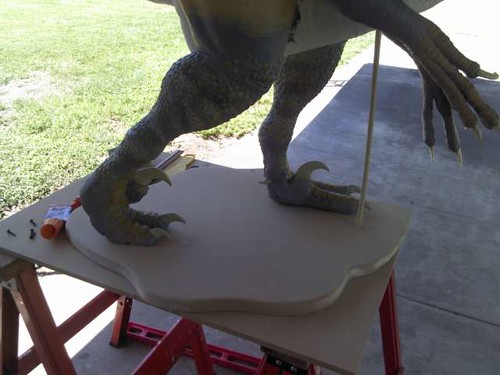
Turning Mr. Deino upside-down I drilled holes in the bottom of his feet and inserted short lengths of PVC pipe, epoxying them in place. I also glued a length of PVC into the already-made chest hole. I then glued lengths of wooden dowel into holes I drilled into the base (one is visible above) so that the bits of pipe in the feet and chest would slide down onto these dowels and fit snugly and stably, but could be removed if necessary.

Later I painted the base with three coats of satin black latex enamel.
Oh yeah-- the feathers.
The bottom layer of white feathers were added first, and I used craft/costume fur (fake of course) for the tail and torso and craft feathers stitched into satin bias tape for the underside of the neck. I glued and pinned everything in place.
I then laid in the top layer of feathers. I used rooster hackle also stitched into bias tape that I purchased from Lamplight Feather Inc. I started at the tail and worked my way toward the head, overlapping each course of feathers enough to cover the previous course's bias tape trim.
The arm feathers were whole dried rooster wings I purchased on Etsy.com. They were also glued and pinned in place.
The feathers on the head obviously couldn't be attached via bias tape, so I pulled them off the trim and glued each one on separately, placing them in holes I made with a metal probe.
And then I was done! I put him in the yard and took a few photographs.
I took Deino to work in a U-Haul van.
Here he is in the back room, waiting for his exhibit to be prepared.
And finally in his home, next to yours truly:
I prepared a little information placard:
Well, that does it for this series! It was certainly one of the most challenging project I've ever done, but also one of my favorites, and writing about it reminded me of the all the crazy things I did earlier this year that I probably never thought I'd ever do. And hopefully I'll get a chance to do another one some day...

Awesome! Looks great!
ReplyDeleteThanks so much!
ReplyDeleteI refer this to my son and he is so thankful for this.
ReplyDeleteAqualine Steel Water Tanks
This series has been such a fascinating and educational journey! “How to Build a Dinosaur Part VI” showcases not only your talent but also your dedication to breaking down complex ideas in an accessible and creative way. It’s impressive how you blend science, illustration, and storytelling so seamlessly. Just like attention to detail matters in art and education, it’s equally important in commercial visuals. For those needing polished product images, a professional product photo editing service can enhance presentation and engagement. Looking forward to more of your unique content!
ReplyDeleteVoor een krachtigere werking kun je Cialis 40mg Bestellen Switzerland. Deze dosering is ideaal voor mannen die een extra sterke werking nodig hebben. De langdurige werking van 36 uur geeft maximale flexibiliteit voor een actief liefdesleven. Bestel Cialis 40mg online en ontvang een snelle en discrete levering in Zwitserland. Kies voor zekerheid en effectiviteit met Cialis 40mg bestellen Switzerland.
ReplyDelete